Let’s be honest: moving a pool table is the heavyweight champion of DIY nightmares. It’s bulky, it’s fragile, and it’s unbelievably heavy (we’re talking 800+ pounds of slate and hardwood).
Most people take one look at their pool table and think, “I’ll just hire professionals.” But then they see the quote. Professional movers typically charge anywhere from $300 to $600—and that’s just for a local move. If you’re moving cross-country, that number can easily double.
If those numbers make your wallet hurt, you’re in the right place.
Moving a pool table yourself is a challenge, but it is entirely possible with the right preparation, a few strong friends, and a lot of patience. This guide will walk you through the process step-by-step, helping you disassemble, transport, and re-level your table without cracking the slate or your budget.
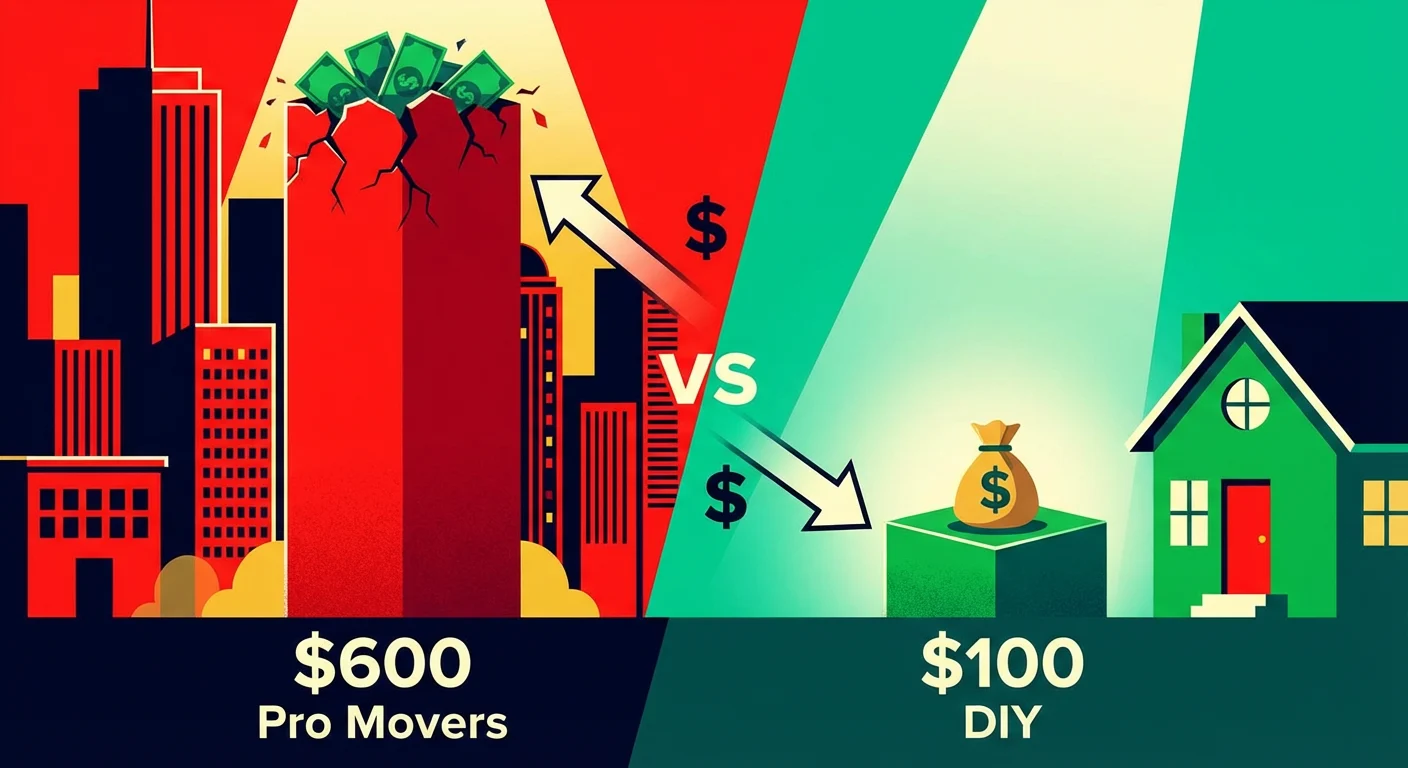
The Real Cost: Professional vs. DIY
Is the sweat equity worth it? Let’s look at the numbers:
| Expense Item | Professional Movers | DIY Moving (You & Friends) |
|---|---|---|
| Labor Cost | $400 – $600+ | $50 – $100 (Pizza & Beer) |
| Equipment Rental | Included | $40 (Truck/Trailer) |
| Risk Factor | Low (Insured) | Moderate (Requires Care) |
| Total Estimated Cost | $400 – $800+ | $100 – $150 |
| Total Savings | — | Avg. $500+ Saved |
Safety First: While saving $500 sounds great, a pool table is dangerous if mishandled. If you have back problems or can’t find at least 3 strong helpers, we strongly recommend hiring pros. No amount of money is worth a slipped disc.
Can You Move a Pool Table Without Taking It Apart?
Let’s address the most common question first. You might be staring at your table thinking, “Can’t we just get four guys to lift it and put it on the truck?”
The short answer is: NO.
Unless you are only moving the table a few inches within the same room (using specialized furniture sliders), you must disassemble the table. Here is why you should never try to move a pool table intact:
- The Slate Will Crack: The playing surface of most pool tables is made of slate—heavy, brittle rock. If you lift the table by the rails or legs, the frame can flex. Even a fraction of an inch of flexing can cause the slate to crack or snap under its own weight.
- The Wax Seals Will Pop: The slate is usually in three pieces, sealed together with beeswax or putty to create a perfectly smooth surface. Moving the table whole will almost certainly break these seals, leaving you with a bumpy surface and a ruined game.
- The Legs Will Snap: Pool table legs are designed to hold weight downward, not to withstand the lateral (side-to-side) stress of being dragged or tilted through a doorway.
The Bottom Line: Trying to move a pool table whole is a shortcut that usually ends in a broken table or a broken toe. Do it the right way: take it apart.
Preparation: Essential Tools & Manpower
Before you loosen a single bolt, you need to gather your team and your toolkit. Attempting this job unprepared is the fastest way to lose a screw or hurt your back.
The “Team of 4” Rule
Do not attempt this alone. You need a minimum of 3 to 4 strong adults.
- The Muscle (2-3 People): To do the heavy lifting, especially for the slate.
- The Spotter (1 Person): To guide you through doorways, hold doors open, and manage the hardware while others are lifting.
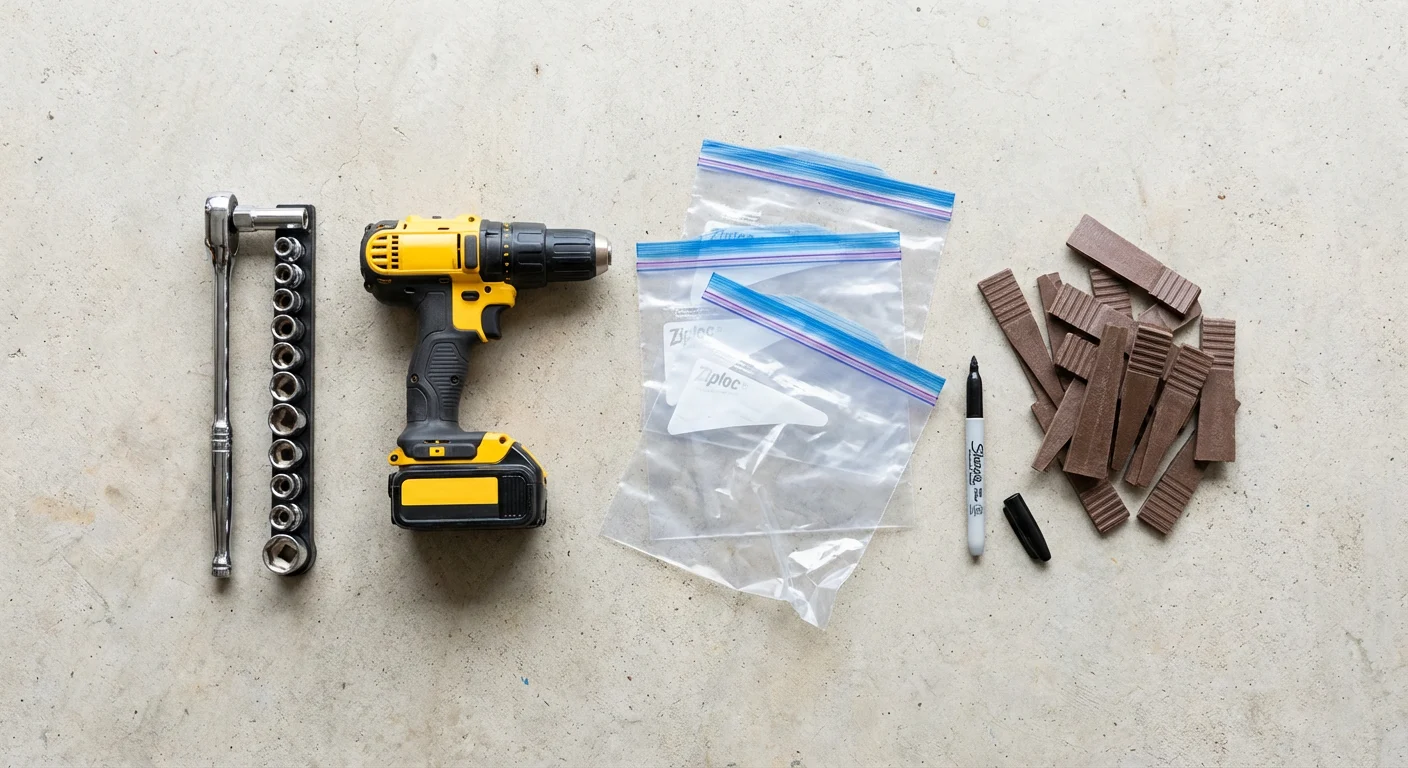
The Ultimate Tool Checklist
You don’t need a professional workshop, but you do need specific tools. Here is your shopping list:
Disassembly Tools:
-
Socket Wrench Set: You will typically need a 9/16″ or 1/2″ socket for American tables. Note: If you have an imported table, have a 13mm or 14mm socket ready.
-
Power Drill: With Phillips and flathead bits.
-
Staple Remover (or a flathead screwdriver & needle-nose pliers): For removing the felt staples.
Organization & Protection:
-
Ziploc Bags & Sharpie: Pro Tip: Don’t just throw all screws in a cup. Bag them separately and label them (e.g., “Leg Bolts”, “Rail Bolts”). It saves hours of frustration later.
-
Painter’s Tape / Masking Tape: For labeling the parts.
-
Safety Goggles & Gloves.
Moving Supplies:
-
Furniture Dolly: A 4-wheel flat dolly is best.
-
Moving Blankets: You can never have too many. You need them to wrap the rails and cushion the slate.
-
Composite Shims: Pro Insight: Skip the wooden shims. Experts recommend composite shims (found at hardware stores) because they don’t compress over time like wood, keeping your table level longer.
Step-by-Step Guide: How to Disassemble a Pool Table
Now that you are prepped, it’s time to start taking the table apart. Work slowly and keep your labeled Ziploc bags nearby.
Step 1: Clear the Pockets and Rails
The first step is to remove the outer rails (bumpers) and the pockets.
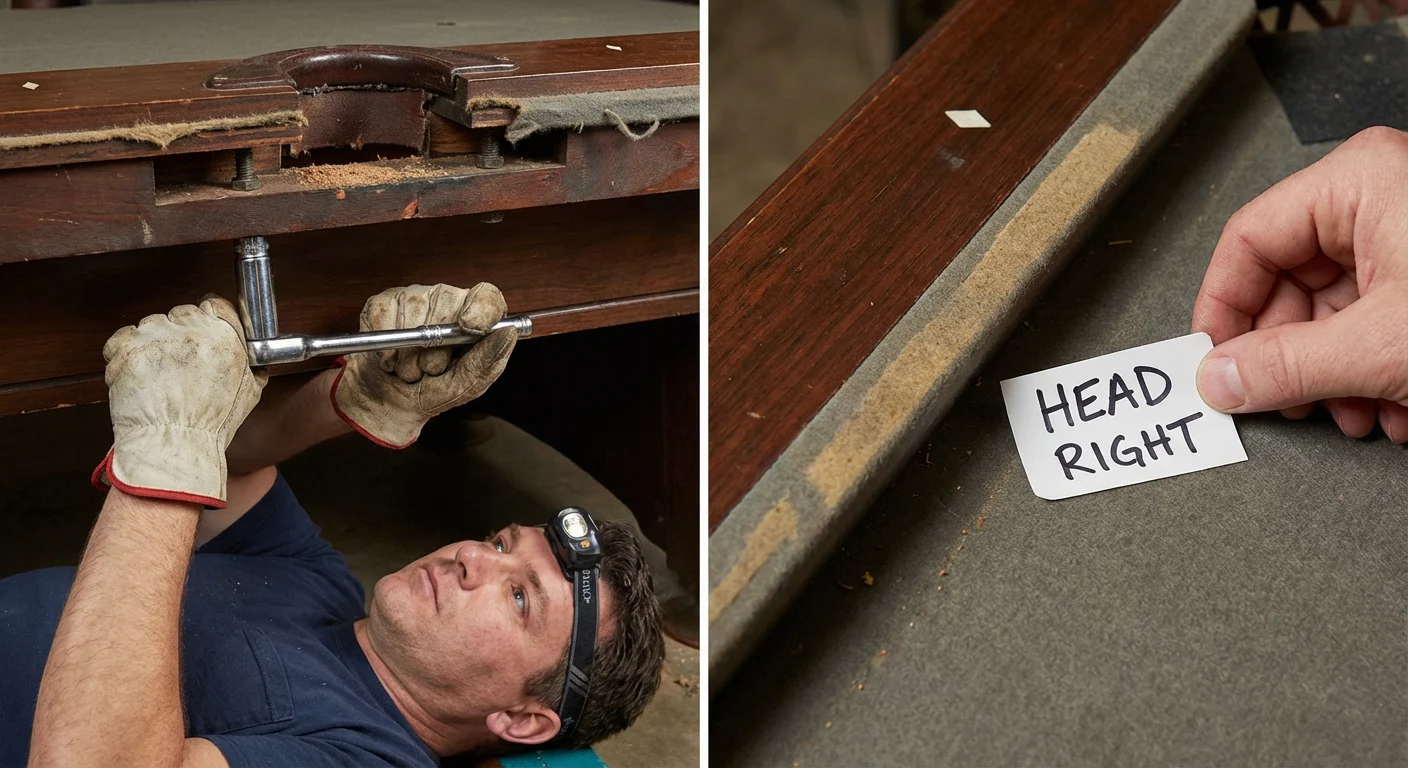
- Locate the Bolts: Lay on your back under the table. You will see a series of bolts holding the rails to the slate.
- Remove & Label: Use your socket wrench to remove them. Crucial Tip: Before you pull the rails off, use your masking tape to label each rail’s location on its underside (e.g., “Head”, “Foot”, “Left Side”). Old tables often have unique screw hole patterns, and mixing them up will make reassembly a nightmare.
- Protect the Finish: Once the rails are off, don’t just stack them on the floor.
Expert Tip: Stack your rails “Finish-to-Finish” (polished wood touching polished wood) or place a moving blanket between each layer. The rough, raw wood on the underside of a rail acts like sandpaper and can easily scratch the beautiful finish of the rail beneath it.
Step 2: Removing the Felt (Staples vs. Glue)
With the rails off, you will see the felt (cloth) stretched over the slate. How you remove it depends on how it was installed.
- Scenario A: Stapled Felt (The Good News)
If your felt is stapled to the wood backing of the slate, you’re in luck. Carefully use your staple remover or flathead screwdriver to pry out the staples. If you take your time and don’t rip the cloth, you can reuse this felt on your new table. - Scenario B: Glued Felt (The Bad News)
If the felt is glued directly to the slate, removing it intact is extremely difficult.Honest Advice: If your felt is glued, assume you will need to buy new felt. It’s rarely worth the hassle of trying to save glued cloth. Plus, this is the perfect excuse to upgrade to a new color!
Warning: If you peel off glued felt, there will be chunks of glue residue left on the slate. You must scrape this off with a razor scraper later, or your new table will have a bumpy playing surface.
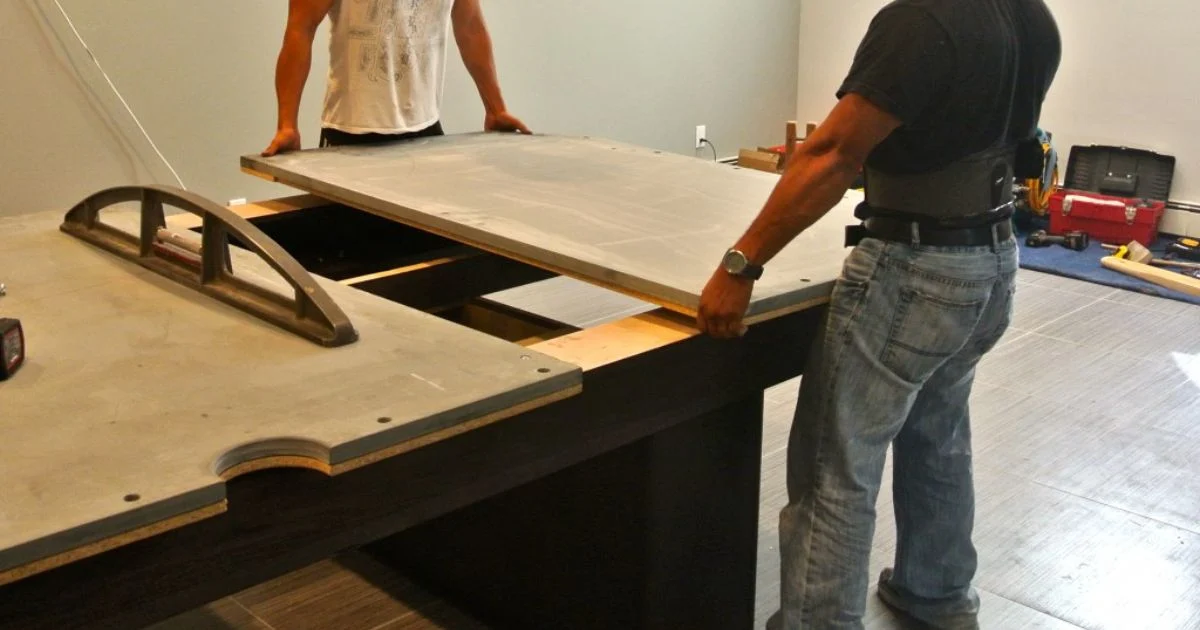
Step 3: Removing the Slate (⚠️ The Danger Zone)
This is the most critical part of the entire move. Most pool tables have a playing surface made of three separate pieces of slate. Each piece weighs between 150 and 250 lbs. They are heavy, slippery, and surprisingly brittle.
- Find the Screws: Look for the screws holding the slate to the frame. Reality Check: You might not see them immediately. They are often countersunk and covered with plaster of Paris, beeswax, or putty. You will need to use a flathead screwdriver or scraper to dig out this filling material to expose the screw heads.
- Break the Seams: The three slate pieces are likely sealed together with wax. You might need to gently tap them apart.
- The “1-2-3” Lift: Communication is key. Before lifting, agree on a verbal countdown with your partner.
⚠️ Critical Safety Rule: Never prop a piece of slate vertically against a wall. If it slides, it will crash and shatter (and destroy your wall). Always lay slate pieces flat on the ground on top of moving blankets.
Step 4: Disassembling the Frame and Legs
Once the heavy slate is out of the way, you are left with the wooden frame (cabinet) and legs.
- Flip It Over: The safest way to remove the legs is to flip the entire frame upside down onto a moving blanket.
- Unbolt the Legs: Now you can easily unscrew the legs without fighting gravity or risking the heavy frame crashing down on your toes.
- Pack It Up: Wrap the legs in bubble wrap and blankets to prevent dents during the move.
Transporting and Loading the Truck
You’ve got everything disassembled. Now comes the logistics. How you load the truck determines whether your table arrives in one piece or as a pile of rocks.
The Golden Rule of Slate: Stack It Flat
For a DIY move without specialized A-frames, the safest method is the Flat Stack Method.
- Create a Bed: Find the flattest part of the truck bed (usually between the wheel wells). Lay down a thick layer of folded moving blankets to absorb shock.
- Stack Them Up (The Safe Sandwich Method):
- Place Slate #1 flat on the blankets.
- Layer of Protection: Place a sheet of cardboard or an old blanket on top of Slate #1. Do not stack stone-on-stone directly. While friction is good, a single piece of grit trapped between the slabs can scratch the surface or cause stress cracks.
- Place Slate #2 on top of the cardboard/blanket.
- Repeat for Slate #3.
- Strap It Down: Use heavy-duty ratchet straps to secure the slate stack to the truck’s anchor points. The goal is to prevent the stack from sliding forward if you have to brake hard.
⚠️ Warning: Never place anything heavy (like the table frame or boxes) on top of the slate stack.
Reassembly: Setting Up in Your New Home
Congratulations! You’ve made it to the new house. Reassembling the table is essentially the reverse of disassembly, but with one massive difference: Leveling.
A pool table that isn’t level is useless. Here is the pro way to set it up:
Step 1: Reattach Frame & Legs
Flip the frame upside down, reattach the legs, and flip it back onto its feet in your new game room.
Pro Tip: Place your table exactly where you want it before you put the slate on. Once the slate is on, you cannot move the table again without risking damage.
Step 2: The “Level First” Technique
Most beginners make the mistake of putting the slate on immediately. Don’t.
- Level the Frame: Use your carpenter’s level on the wooden frame itself. Use composite shims under the legs to get the frame perfectly flat.
- Add the Slate: Carefully place the three slate pieces back onto the frame.
- Fine-Tune: Now, check the level of the slate surface. You may need to drive small wedges (shims) under the edges of the slate to get the seams perfectly flush.
Step 3: Sealing the Seams
You will likely have tiny gaps between the three slate pieces.
- The Amateur Way: Using car body filler (Bondo). It’s hard to remove later.
- The Expert Way: Use Beeswax. Melt specialized beeswax into the seams with a small torch or heat gun, let it cool, and then scrape it flat with a razor blade. It creates a seamless surface that allows the ball to roll perfectly, but it’s easy to remove if you ever move again.
Step 4: Refelting and Rails
Stretch your felt (new or old) over the slate and staple (or glue) it down. Then, bolt your rails and pockets back on, making sure to match the labels you made during disassembly.
Frequently Asked Questions (FAQ)
Q: How heavy is a slate pool table?
A: A standard slate pool table weighs between 600 and 1,000 pounds (270-450 kg). The slate alone makes up about 60-70% of that weight.
Q: Do I need to remove the felt to move a pool table?
A: Yes. The bolts that hold the slate to the frame are hidden underneath the felt. You cannot disassemble the table without removing the felt first.
Q: Can I transport a pool table in a pickup truck?
A: Yes, a standard pickup truck is perfect for moving a pool table. Just make sure to measure the bed length to ensure the slate pieces will fit flat.
Q: Is it hard to move a pool table by yourself?
A: It is impossible and dangerous to do it by yourself. You need a team. However, doing it as a DIY project with friends is difficult but manageable.
Conclusion
Moving a pool table is no small feat. It tests your muscles, your patience, and your friendships. But look at the bright side: by following this guide, you’ve not only saved yourself $500+, but you’ve also learned exactly how your table works.
Now that your table is set up and leveled in your new game room, it’s time to crack open a cold one, rack ‘em up, and enjoy the game. You earned it.
Still feeling overwhelmed?
If reading this guide made you realize you’d rather pay someone else to do the heavy lifting, there is no shame in that.